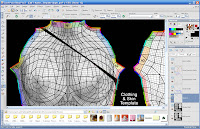
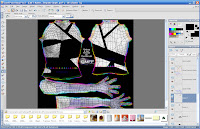
From our drawing, we get a rough idea of what we want.. really rough.
As I mentioned in my previous post, it gets a little more complicated when you're fitting it to a 3D model.
Let's talk about programs first.
I use a number of programs, but I'll simplify it here as much as possible.
To do the basic template, which we're discussing in this post - I use Paint Shop Pro.
Why?
To put it simply, the pen tool is easier to use, and I like that you can zoom in with the mousewheel.
That's pretty much it.
It's also a little easier to fill with a pattern than in Photoshop.
If I'm creating the pattern from scratch, I use photoshop the whole way, but to make things quicker, and by fault, easier, Paint Shop Pro is the way to go.
First, bring up your templates that you can find on the forums, I use Chip Midnight's
I can't live without the shading guides and the seam labels haven't done me wrong.
Click on the pen tool, and make sure "show nodes" and "connect segments" is checked at the top.
Keep the background color black, it leaves just a hint of an outline of black when you fill in the color, and leaves a cleaner line (in my opinion)
Click away!
Yes, it's that easy, you just connect the dots pretty much.. but here comes the first obstacle.. The boobs.
I started on the shoulder pieces, I always find it's easier to work in segments and move from top to bottom. The shoulder strap starts thin, then opens up to cover more as it lowers.
As I go from the shoulder, I realize the obvious place to put my next little box is right where the armpit is. See those triangles at the sides?
Stay away from them unless you either:
a. Are using sleeves
or
b. like looking like you've bled fabric into your armpit
So I move down a little bit, but uh oh, I don't want to go too low and end up showing nip. I pick the bar closest to the arm and settle for it. I trace my line back up to the shoulder and.. OH NOES! The line isn't how I wanted it to look. It's a broad strip remember? This is just kind of a wisp of fabric.

That's okay, just make it broader at the bottom, and cover more of the boob, right?
Nope.
Well.. I could I suppose, but what everyone always forgets, is that when you put something over the boob as far as a texture goes, it stretches. I'm using leather for this, so the more I have just one thing over the boob, the better. If I use this particular strip to cut it in half basically, I'll end up with a seam that looks like it's busting worse than a fat lady in Givenchy.
Time to alter the plan!
Remember when I said "Don't be afraid to draw"?
It goes here too. Sometimes your plan doesn't work, but if you just keep drawing, you end up creating something even neater than you intended.
After about five minutes of random clicking and repositioning I came up with this:
 Just switch all those vectors to rasters, and there you go, your very first template!
SAVE
SAVE
SAVE
oh, and did I mention, SAVE?!
Fill in the holes with separate layers (more pen tool)
That way it'll be easier to fill when it comes to fabric filling.
I won't post a picture of it, because it'll just look like blackness on a template.
Next up, fabric picking!!!
For this, we're going to look for fabrics, so fire up your internet explorer, and search google for "Stock Photos" or swatches. Check the copyrights on it!! If it's not free to use, don't use it!
No comments:
Post a Comment